P-11/P-40 Trigger Pre-Travel modification
Back to Kel-Tec stuff
Before you begin even reading this you should be able to disassemble your P-11
and remove the trigger from the frame (instructions for that here) and be familiar with the parts that will be
referenced in the instructions (also here) .
Replacement/duplicate parts to order first
trigger (part 252)
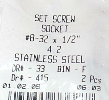
set screws
This modification only modifies the trigger of your P-11 or P-40 (part 252). I
suggest ordering a couple of triggers from KT before you even think about
starting (they are only $.50). I took 3 tries and used the best of the three
(was my second try) so I would get at least 2. You may want to look around the
site (and others) a bit and think about what other mods you may want to try and
order a few extra parts all at one time because KT has a set shipping charge
for any number of parts you order. So for just a few bucks extra you can get a
hand full of other spare parts to try other mods on in the future or as a back
up for when a spring goes flying (assembly pin spring, hint, hint). In any
event this mod only involves modifying the trigger.
I also suggest that when you modify parts to modify the new extra ones so that
if you mess them up you still have the original ones and you have not changed
the operation of the pistol at all. Plus if there have been any slight
improvements or modifications, you will be sent the new pieces and when you
finish the mod you will also have the factory improvements (and you have to re
function test any way, so why not do both changes...).
|
You will also need to go to the hardware store and pick up some set screws. I
ended up using a Stainless steel 8-32 X 1/2" set screw. I would recommend
picking up a small assortment of 6-32 (if you wish to try using a smaller one
first like I did) and 8-32 set screws in various lengths (probably 1/2" and
smaller, I doubt you would need longer), or you could just get a longer one and
shorten it. I used a 1/2" one, but have shortened my trigger and moved it back
so your pre travel length will be different than mine and the same 1/2" set
screw (while it will still work) may stick out the rear of the trigger, and I
just think it looks bad. You want to end up with a pre-travel stop set screw
length that (when adjusted
properly) will fill up a majority of the hole you made in the trigger. This
will help strengthen the trigger and help keep the pre travel stop from moving. You don't need
it sticking out the bottom (that would get in the way of the pin that holds the
trigger axis in) but try to keep it just under the
surface.
|
|
|
|
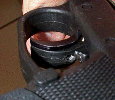
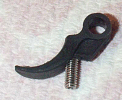
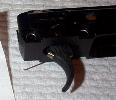
Just to give you an idea of what you will be doing, these pics shows about what
you should end up with after drilling a hole in the trigger then tapping it.
|
|
|
|
First remove the frame from the grip and then the trigger from the frame. Look
carefully at how the trigger rotates on it's axis in the frame, and at what
angle the stop will have to have in the trigger to hit the frame and not go
into the well cut into the frame for the trigger axis end of the trigger. You
want the stop to be as angled as possible without interfering with the trigger
axis pin (part 253) on the bottom of the trigger, or going off the ledge on the
front of the trigger. You want them to be as far in the direction of the
arrows as possible but still in the center of the trigger from right to left. The whole
in the first pic is not close enough to the edge. The position of the hole in the bottom
of the triger (second pic) is about right. You wan the stop to be as far
counter clock wise as possible (looking at it from the left side, like in the third
pic). I don't have any specific way of
telling you how to measure this (that's why you have a few extra) just hold a
set screw up to the side of the trigger to get an idea of where it should go.
Then maybe draw a line with pencil or something on the trigger to give you a
reference point.
|
|
|
|
Now drill the hole in the trigger, I used a clamp and a drill press to line up
and drill the hole in my trigger. You could use a hand drill but you must keep
it as straight as possible (it does not have to be perfect but you want it as
close as you can) and I would still recommend putting it in some kind of vise or
clamp. I drilled it for a 6-32 then tapped it with a 6-32 tap to try the 6-32
set screw first. Mine did not contact the frame enough for me (it just nicked
it). So then I ran the 8-32 tap through the trigger a few times (I did not
drill it again, I wanted it tight) and then set screw hit the frame pretty good.
These 2 pics show the 6-32 nylon stop that just barely does not contact the frame.
|
|
|
|
Once you get a good tapped whole in the trigger that is centered left to right
on the top and bottom, and positioned so that the stop contacts the frame
solidly, then you can reassemble the P-11 or P-40. You may have to clearance
the opening in the grip that the trigger goes through (in the very front part)
for the stop to travel through this same hole when the trigger goes forward.
You want the stop to engage the frame not the grip. I had already enlarged my
trigger opening to allow me to remove the frame from the grip without removing
the trigger shoe. If you must clearance any, you will not have to remove
much and you will be able
to see where it is hitting and remove small amounts accordingly.
|
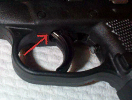
click to enlarge
|
After it is back together adjust the new stop with an allen wrench so that you
have very little pretravel and you may or may not have to apply loc tite to the
threads to keep it adjusted depending on how tight your threads are in your trigger,
so you must do your own testing and determine if it is needed, or just put some on
if it makes you feel beter, I may when I stop messing with the thing...
Some of the reasons for doing what I did, other ideas I had, and what I went
through:
|
|
Mine actually could be angled a bit more (counter clock wise in the pic looking
at the left side of the p-11) to hit the frame more in the middle of the stop.
|
My first thoughts were to use 6-32 or 8-32 nylon screws through the trigger to
be the stop (much like my over travel stop here). This was
because I kinda liked the idea of a nylon stop hitting the frame better than a
metal one. But when I drilled and tapped the trigger, the nylon screws were
way too tight and when I cut the large head off of them and add a slit with a
dremel to the end so I could use a flat blade screw driver to turn them, the
ears I made for the screw driver broke off. I could have made the threads
looser by running the tap through it a few more times, but I wanted it tight so
it would stay put without lock tite. Plus I would have never been able to
adjust it after the lock tite set in. Back to the steel stop hitting the frame,
I am not really worried about it but if I were I would just get a nylon acorn
nut to put on the end of the stop, or maybe some kind of plastic cap.
So I ended up using a Stainless steel set screw with a hex end on it. This
made it easy to adjust (even with the whole pistol together) and went in tight
and probably will not require lock tite to remain adjusted.
I also wanted to use the 6-32 size (so the hole in the trigger was a small as
possible as to weaken the trigger as little as possible), so I started by
drilling and tapping that size into the trigger. In my attempts the 6-32 size
nylon screw cleared the frame and went into the hole for the trigger in the
frame (not stopping the trigger). So just using a tap (8-32 size) I enlarged
the hole to 8-32 and then my stop engaged the frame to prevent the trigger from
traveling forward.
|
