Shortening the Trigger Travel
Back to Kel-Tec stuff
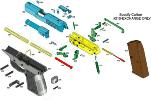
All part number references match these numbers:
My original travel (from where the trigger begins to engage the hammer to
when it releases the hammer) was about .9 inches (at the tip of the trigger shoe).
|
I started by putting a piece of tape on the bottom of the trigger guard to
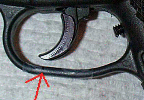
make marks on, to keep track of changes. Then I made a mark where the trigger
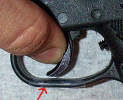
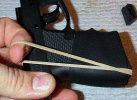
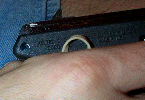
begins to engage the hammer (first pic with hammer at rest, and second with
it just beginning to engage the hammer) . Then you may make 2 additional
marks, one for where your trigger breaks now, and another at where you
want it to break. I was shooting for about .55 inch trigger pull (third
pic) and ended up with .57 inches.
|
|
|
|
I tried using rubber bands as the trigger spring when doing adjustments,
but found that
the hammer would release sooner under the higher tension of the hammer
spring, so then only used the rubber bands for a quick reference, and
did all checking by assembling my
p-11 (without the assembly pin spring and only pushing in 2 frame pins
half way to make it a bit quicker) and pulling the trigger with a snap
cap in the chamber.
|
|
|
|
if you are willing to stop the hammer from hitting the frame with
your finger you can
skip putting the slide on and just put the frame in the grip to test the
trigger pull, but do not
let the hammer drop on the frame.
|
|
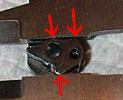
Now take out the the trigger bar and hammer and look closely at how they interact.
How the trigger bar catches the hammer. What you will be doing is
filing off some of the catch on hammer so that the bar will slip off the
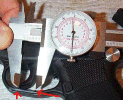
hammer sooner. I used calipers to keep track of how much metal I took off
making sure to measure the same way every time. The problem with measuring
this way is that the bottom point (the curved area that is touching the
bottom of the calipers) does not affect the release point. The release
point is the catch just to the left of that point, so if you file straight
you will have to take off this rounded part first before you even begin to
affect the release point. But when you start affecting the release point
move very slowly.
|
|
|
|
Now file some of catch off of the bottom of the hammer. Make sure to keep it as
straight and level as possible. I filed some then assembled and checked pull
length. Repeat this until you have a slightly longer pull than you want.
It may shorten up a bit when the parts wear to each other. Then I smoothed
the area I filed with 400 grit, then 1000 grit then polished with a dremel.
This final smoothing with help keep the trigger pull smooth and shorten it
just a bit.
|

click to enlarge
|
|
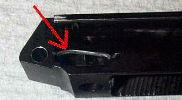
As you take away more metal from the hammer you may (probably will) notice
that the trigger bar may not be able to move up enough to engage the notch
on the hammer because it is limited by the window opening in the frame.
I opened up the window (mostly at the rear) so that the trigger bar can
travel high enough to fully engage the catch on the hammer.
|
click to enlarge
|
|
After widening the window in the frame I sanded with 400 grit then 1000
grit until it was very smooth (the transfer bar may slide on it a little
so you want it smooth). Then I cold blued all showing metal to try to
keep it protected.
|
After doing this I have about .48 inch
pull length at the center of the trigger with very little pretravel and overtravel.
After shortening and lighening the trigger pull, I also clipped 7 coils off of my firing pin spring,
more on that here.
|
