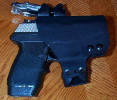
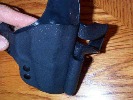
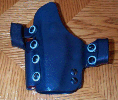
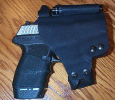
Fist K1I mostly use a Fist K1 with belt loop adapters and wear it in the extreme forward cant position. I still wear my IWB sometimes for ease of putting it on and removing it, but usually wear the Fist one if I'm out for a while (at about 3 o'clock by the way). The reason I chose the fist one was because it has an adjustable cant, and can be converted to IWB if I wanted to, and I was not sure exactly what I wanted, so I wanted to be able to change things around a bit to find out what worked best for me. Turns out I like it the best at the extreme forward cant position at about 3 o'clock. This is comfortable for me sitting standing and driving, and is easily drawn. Also the fist one is a bit thinner than the Comp-Tac one, and I like that. The only negative I have to say about the Fist one is the retention. It is indented in the whole trigger guard area, and would touch the sides of my trigger shoe on my P-11. I seriously doubt there would ever be enough grip between the slick inside of the Kydex holster and the side of the trigger to pull the relatively long and heavy trigger pull of the P-11, but still I did not like it. So I heated the trigger guard area of my holster and let it flatten out, then only indented the area in the trigger guard in front of the trigger (much like the comp-tac one, but still not quite as crisp).
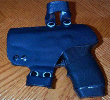
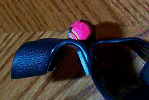
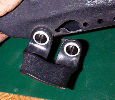
I added my own attachment to the front to hold the AAA mag light. I know it's not much light, but it could be better than nothing. In these pics I have a screw with the head ground almost flat and a normal nut holding it on. This works ok, but I will be getting another set of screws from Fist like the ones that hold the belt loop adapters on. This will be much better.
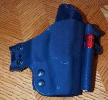
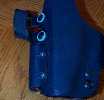
I emailed Fist about getting some additonal screws like the ones that hold the belt loop adapters on, and they sent me a few different sets (3 different heights). The shortest of the sets worked perfect. If you ask for these when ordering the holster, they will probably through them in for you. Here are some pics with the proper fasteners.
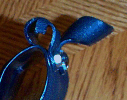
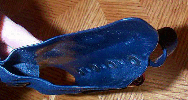
well I went to remove my holster and put it away when I noticed the area where one of the belt loops attaches to the holster was broken. Closer inspection also revealed a crack in it.
This was their reply:
Well since I bought it around 1/1/03 it was well over a year old, and I was leaving for the weekend in a couple of days and knew I would never have a new one by then, so I figured I give making myself a new one a try. I went to the local craft store and got some Plaster of Paris and I already had some kydex around the house from other holster projects. First I stripped off all of the mounting hardware and set it aside, and got a small nut and bolt to hold the open end together (part where the belt loop fastens to the holster by the trigger guard, if you don't do this the weight of the plaster will open up the kydex and make the mold to fat, ask me how I know... :) ), then duct taped up all the holes and gaps in the holster, leaving a hole in the top to pour in the plaster.
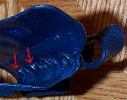
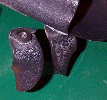
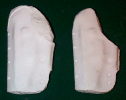
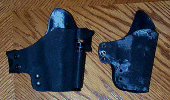
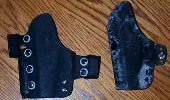
Then I sprayed in some lubricant inside the holster and wiped it around with a piece of rag on the end of a screwdriver (so the plaster does not stick to the holster). Pour in the plaster and let it set for 30-60 min. Then peel off the tape, and remove the plaster, you may have to do some trimming to get it out because the tape is not perfect and some probably spilled out, but the plaster is still soft and easily carved still. When you get the excess off, then open up the holster and remove the plaster cast and let harden all the way up over night. The one on the right was my second attempt and in this one I trimmed away more of the plaster when it was still soft (about 60 min after pouring it). I first tried it with the one on the left and figured the Kydex would go into the grooves and give me a line to cut on (you can see the outline of the holster in the cast), but no such luck. It was better to have the kydex fold in or kinda drop off where the holster should stop.
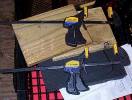
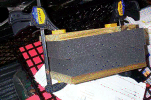
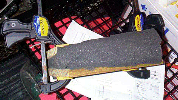
Then I took a sheet of Kydex and cut it to the approximate size, and put it in the oven on a cookie sheet at 200 degrees for 5 min. When you take it out you have to act quick, as it cools quickly (but use gloves of some sort as it will be hot). I wrapped it around the plaster cast and put it between 2 thick pieces of foam between 2 2X6's then squeezed them together with quick clamps (some squeeze clamps I had around). Then let it set like this over night.
I then made some templates out of poster board using the old holster, to show me exactly where to cut the new one (the shape was now good, but I had to know where to cut the edges). I cut them out so that when wrapped around the old one it was the same size as the old holster. Then wrapped them around the new one, and traced the outline on the new holster. Then with a razor blade I scored the Kydex along the line. Then using a pair of pliers I broke the Kydex along the lines by folding it on the line. Then I went back and cleaned up and shaped the edges with the dremel sanding wheel to get the final shape. Then used 400 grit by hand to round all of the edges.
Then got back out my templates and pushed holes in them with a small screwdriver while holding them over the old holster to mark the holes in the new one. Then drilled out the holes in the new holster, installed the old hardware, and indented the front of the trigger guard to get the desired retention. Now I have a new holster just like the old one.
|
