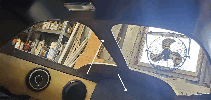
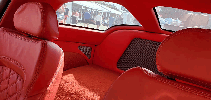
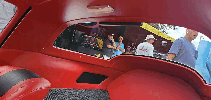
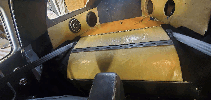
In general, when possible, staple things down, not just glue them, glue tends to eventually fail, I am looking for something that will last a long time, this was my Dad's car that I have known since I was 6, and I plan on keeping it for the foreseeable future. I would also prefer no visible fasteners most of the time, although it is not a deal breaker if not overboard/noticeable.
Seats
Console
Same seams on the console storage lid, kinda like they are now, but with matching seams to the console.
Console Removal
General steps to remove the console (more details in below video):Remove window switches
Remove cup holder
Unscrew allen bolt inside the cup holder hole
Disconnect 4 pin connector in cup holder hole
Put into 4th gear, unscrew shifter ball
Push down on ash tray lid (plate held up underneath with magnets)
Pull back on shifter plate, then lift off
Remove 2 screws inside console storage
Remove 3 screws under shifter trim plate
Slide console back, while lifting the rear up to the roof
Only difference when reinstalling, is to first make sure the wings are spread a little and don't catch on the carpet on the transmission tunnel, and make sure the wings are caught on the large headed bolts while pushing forward. The driver's side one may need to be pushed in a little to catch. And to make sure there are no wires between the bottom of the console box, and the aluminum bracket it rests on
https://www.youtube.com/embed/k6zyoeAkbKk
On the front side wings, there are 2 small/thin panels screwed on. These can just be covered in leather then screwed back on, or I'm open to ideas here on what to do to cover this area, but spaces is limited here.
Please be careful when pulling the console in/out not to scratch up the bottom of the dash or glove box with the top of the "wings" Also be careful not to scratch the shifter plate.
Carpet
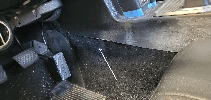
We will Likely have to glue down the rear main flat piece in the rear also.
The wood floor has spacer blocks that have been epoxied to the car. To screw down the wood floor, cover in carpet, predrill these holes (or the blocks WILL SPLIT, please don't split them, and don't drill or screw all the way through the fiberglass floor. Then just screw them down to these blocks.
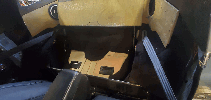
Cut an opening out in the center of the lift portion for a handle (rough idea drawn in). I do NOT want an external handle just screwed on here. I suspect carpet would just be pulled over this edge to finish this part off? (open to ideas here)
I also need something for floor mats, maybe just something made from carpet pices? or maybe just buy something? but I kinda want something with some sort of anchor, so they don't just slide around out of place.
Head liner:
Also an inlay pattern example on the back panel, not 100% sure on this, but open to ideas like this (maybe with perforated leather like the seats?)
Rear Side Panels:
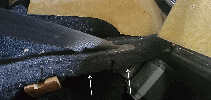
Do something to cover this area in leather, it could be to cover these in leather, or to make some panel that goes over these that is covered in leather, or if you think it is easier/better to make a new panel.
I am open to ideas about the speakers, they can just show the grills on top of the covering like they are now, but would consider other ideas.
Make small filler panels covered in leather that go in front of the current rear panel, basically beside the seats, under the halo. Ideally with no visible fasteners, but ok with a couple here if needed.
Also if making a new (entire, or cover piece) side panels, maybe 1 piece for each side all the way from the back to the front, instead of needed a seam there between the 2 pieces?
General Concepts:
Flat carpet, and leather panels would be good, but I may be open to the idea of some sort of pattern/details added, but I'm not exactly sure what. Possibly some sort of trim piece, accent piece, or maybe an inlay of perforated leather like the seats. But I do want to hear the idea to see if I like it before doing it, to make sure I like the style. Stock front headliner and halo are ok, but also open to them more matching the rear (maybe even 1 piece?)
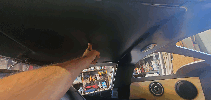
Note on the front headliner, I would like the head room of the stock head liner with it all the way up (but staying up, unlike mine). The way it is right now, my head is very close to the sagging headliner.
Windows:
Front windshield needs to be sealed, and trim installed. Rears windows need to be installed (I have them) sealed, and trim installed.
Potential future fixes:
Just to get an estimate on (I want to start driving it, so it probably won't be now)
Fix scratch on passenger side headlight bucket
See what can be done for the area around the driver's side turn signal under the bumper stress/cracking
Maybe a dyno run:
Just to see what it is doing now. Notes here, to obviously keep an eye on the AFR and obviously get out of it, if it starts leaning out. Also guessing as to what to expect, hoping about 600 at the rear, but also if we see 650 to lift. It is an aluminum LS1, and from what I've heard they are good for about 800 block HP before bad things start happening.
